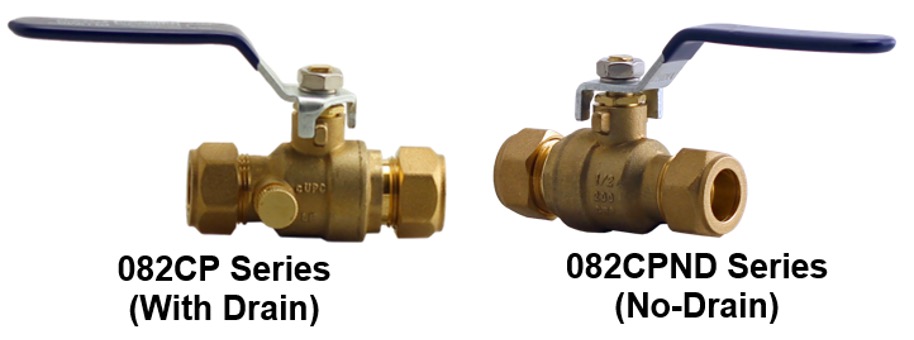
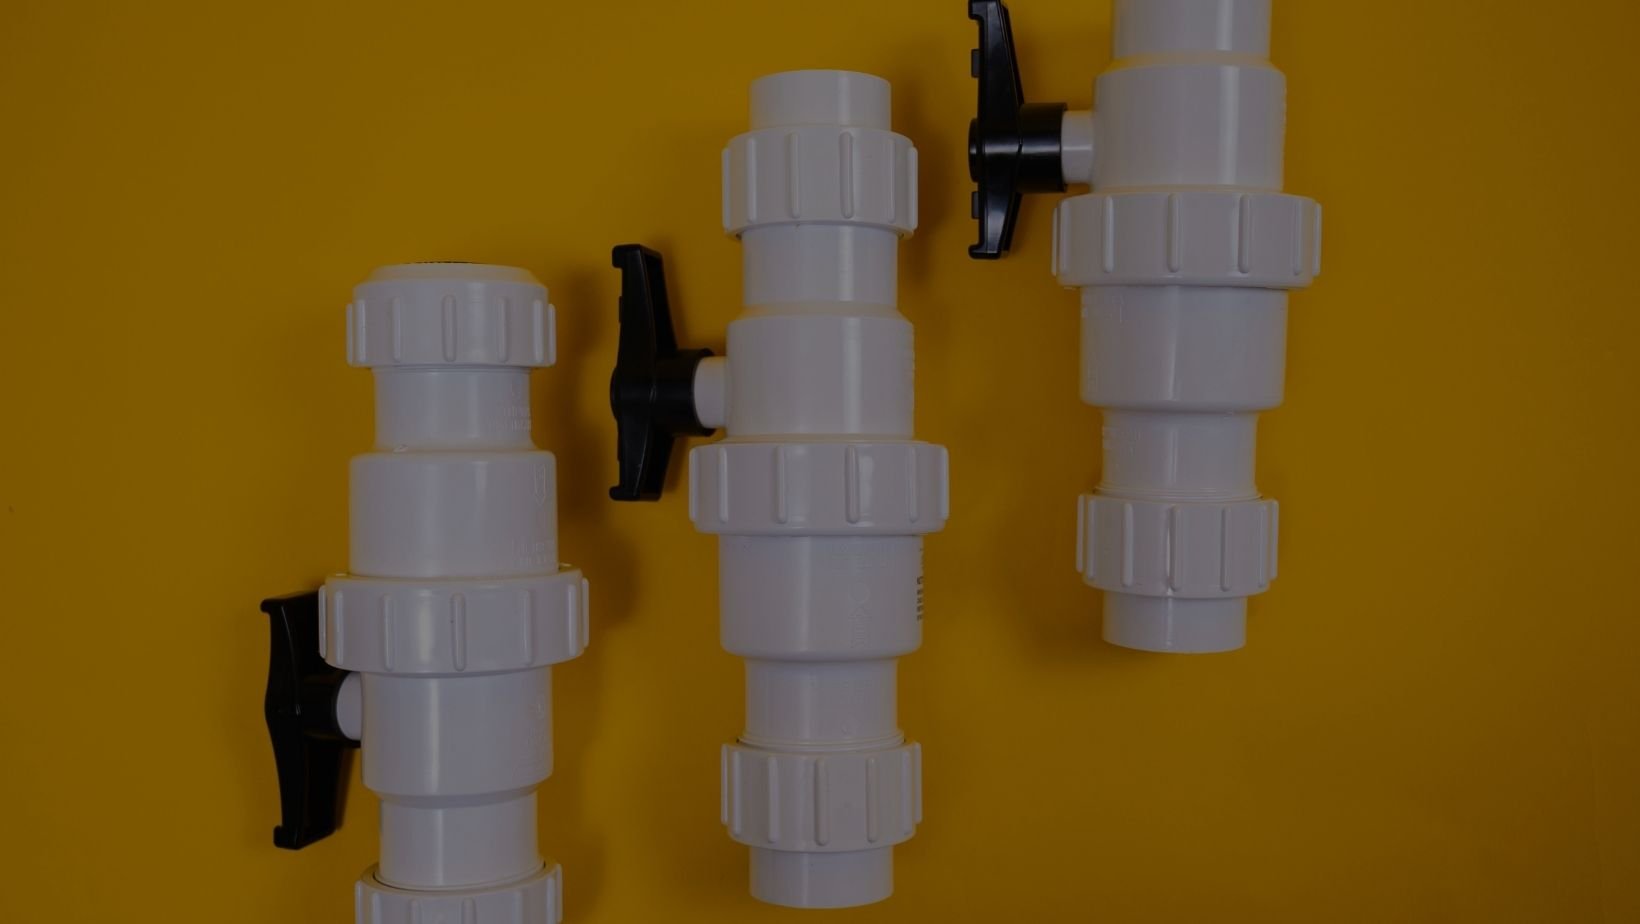
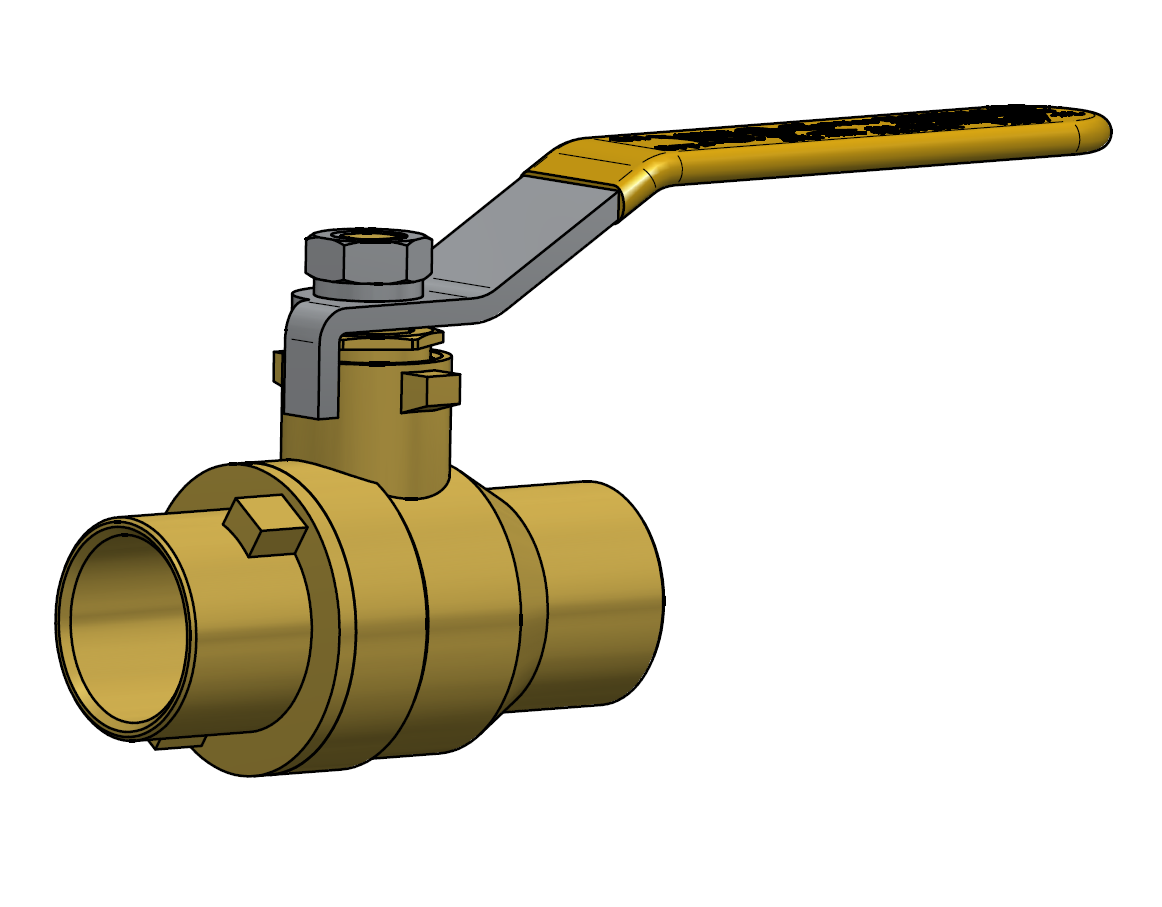
Compression Ball Valves are a great option due to their ease of installation and no need to solder. In this blog, we will go over the detailed steps to install these valves in a plumbing system.
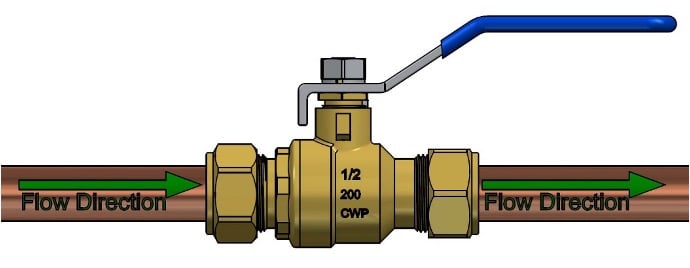
VALVE ORIENTATION: Ball valves may be installed vertical or horizontal pipe runs are bi-directional therefore flow direction is not critical, however the best practice is to set up the valve handle to point in the direction of flow whenever possible. The valve stem orientation is not critical, however any deviation from vertical is a compromise. Installation upside down is not recommended because it can cause dirt to accumulate by the stem packing. The best practice is to install with the valve stem facing upwards whenever possible.
INSTALLATION STEPS
#1 – Inspect the ball valve ports, seating surfaces and sockets to ensure they are clean and free of foreign debris
#2 – Operate the valve from fully open to fully closed position.
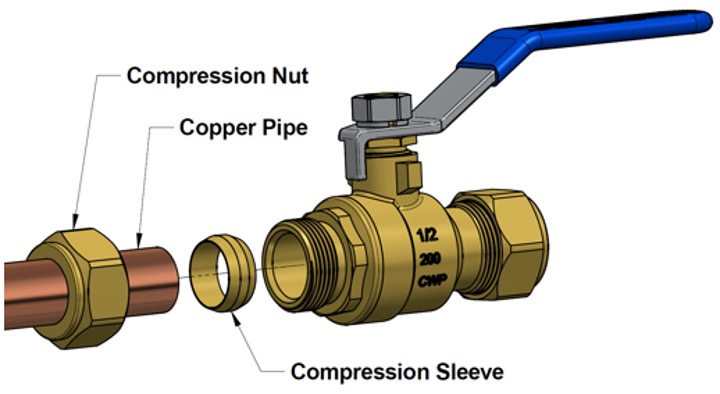
#3 – Ensure the Copper, CPVC, PEX or PE-RT pipe ends being inserted into the valve are square cut, clean and free of burrs, foreign material.
#4 – In preparation for inserting copper pipe, the pipe ends should be thoroughly cleaned with steel wool or emery cloth.
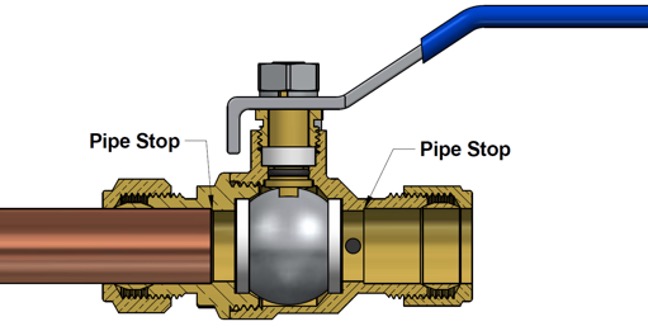
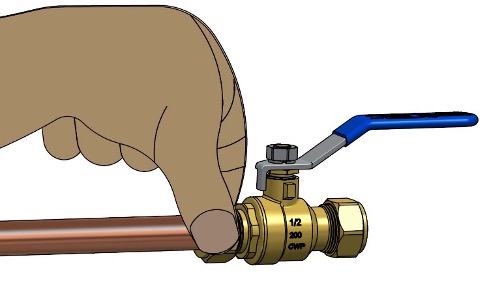
#5 – Insert the pipe through the compression nut and compression sleeve, fully into the compression end until you feel the pipe contact the stop.
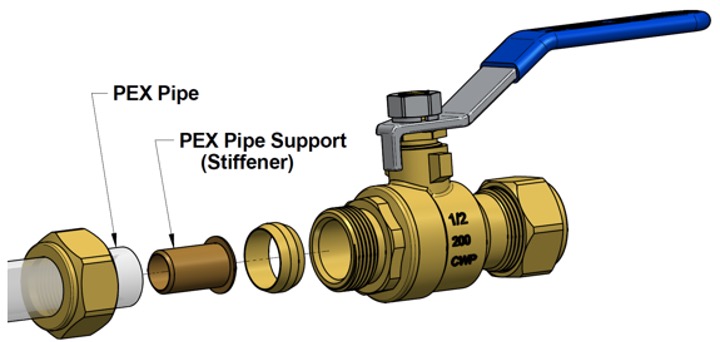
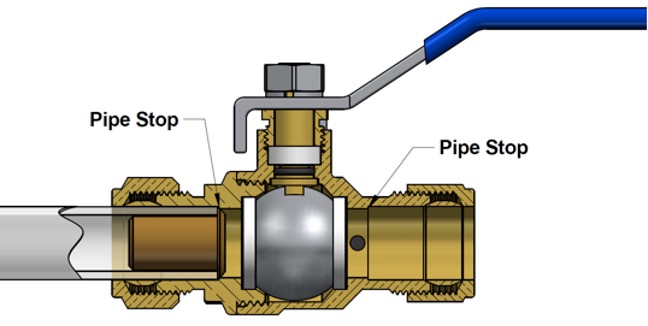
If installing PEX or PE-RT pipe, support inserts also called stiffeners must be inserted into the pipe to ensure the pipe is round and has the support required to make a compression connection.
Make sure that the pipe is aligned with the valve and remains seated firmly against the stop.
#6 - Tighten the compression nut by hand until finger tight, a drop of lubricating oil will ease nut assembly. Make sure the pipe remains seated firmly against the stop during the tightening process.
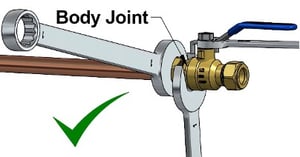
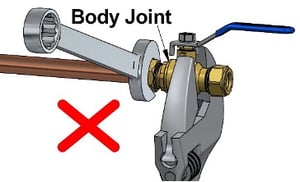
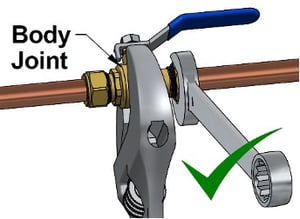
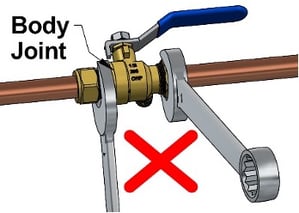
Then using a smooth jaw open end or adjustable wrench tighten an additional ½ to ¾ turn, further tightening should be done in small increments checking for leaks after each adjustment. You can always tighten a compression fitting more, but you should never loosen a compression nut on the valve body. You should only need tighten a compression fitting 1-1/4 turns at the most. Never use a pipe wrench or pliers on compression nut as it could distort the nut compromising the valve body joint connection.
CAUTION: DO NOT OVERTIGHTEN. OVERTIGHTENING CAN LEAD TO FAILURE AND LEAKING LONG AFTER INSTALLATION.
#7 – Repeat on the other end, then restrain pipe and ensure there is no stress, shearing, or pulling on the valve.
#8 – Support the valve and piping in alignment to prevent any unnecessary stresses on the valve body by connecting the pipe. Pipe supports must be capable of keeping the pipe in alignment and bearing the weight of the fittings, valves, pipe, and its contents.
WARNING: Failure to properly support piping will void warranty and could result in structural failure and property damage.
SYSTEM DESIGN
The required approvals & certifications, pressure & temperature ratings, suitability of the valve component material, valve body and trim including the seats and seals are solely the responsibility of the system designer. Valves should be installed in piping systems that comply with the applicable portions of the ASME B31 standards. Special considerations may have to be taken with respect to pipeline expansions and contractions and the media expansion and contractions within the piping system.
OPERATION
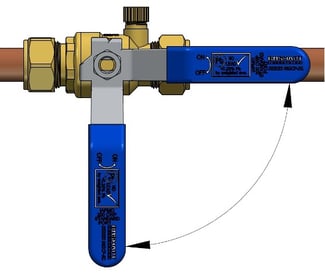
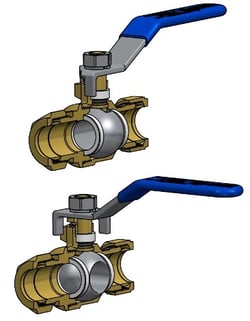
The valve handle is marked showing proper rotation direction for “ON” and “OFF” positions. Rotation is clockwise for “OFF” (closed) and counter clockwise for “ON” (open). The handle indicates the ball port direction. You can control the flow by moving the lever between 0° and 90°. A partially open ball valve, however, can leave the PTFE seats on either end of the ball susceptible to deformity from uneven pressure. Under certain conditions, throttling flow in the near-closed position can destroy the valve seats.
One advantage to quarter-turn ball valves is that they can be opened or closed quickly, the disadvantage is that this makes water hammer more likely. For this reason, it is best to turn the lever on a ball valve slowly.
INSPECTION & MAINTENANCE
 #1 - Other than cycling of the valve from open to closed position periodically. Inspection and preventative maintenance are not required
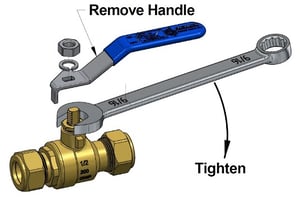
#2 – Normal stem packing wear can be compensated for by tightening the packing nut. Tighten the packing nut clockwise in 1/8 turn increments until observed leakage stops. Overtightening will increase the torque required to operate the valve.
#3 - Do not repack valves under pressure. Repair or replacement of two-piece ball valves internal parts is not recommended. Damage can occur to the body and tailpiece during disassembly that would make the valve inoperable.
Have further questions about this subject?

Head over to Boshart's Knowledge Base: technical product information, guidelines, and more.

SHARE